
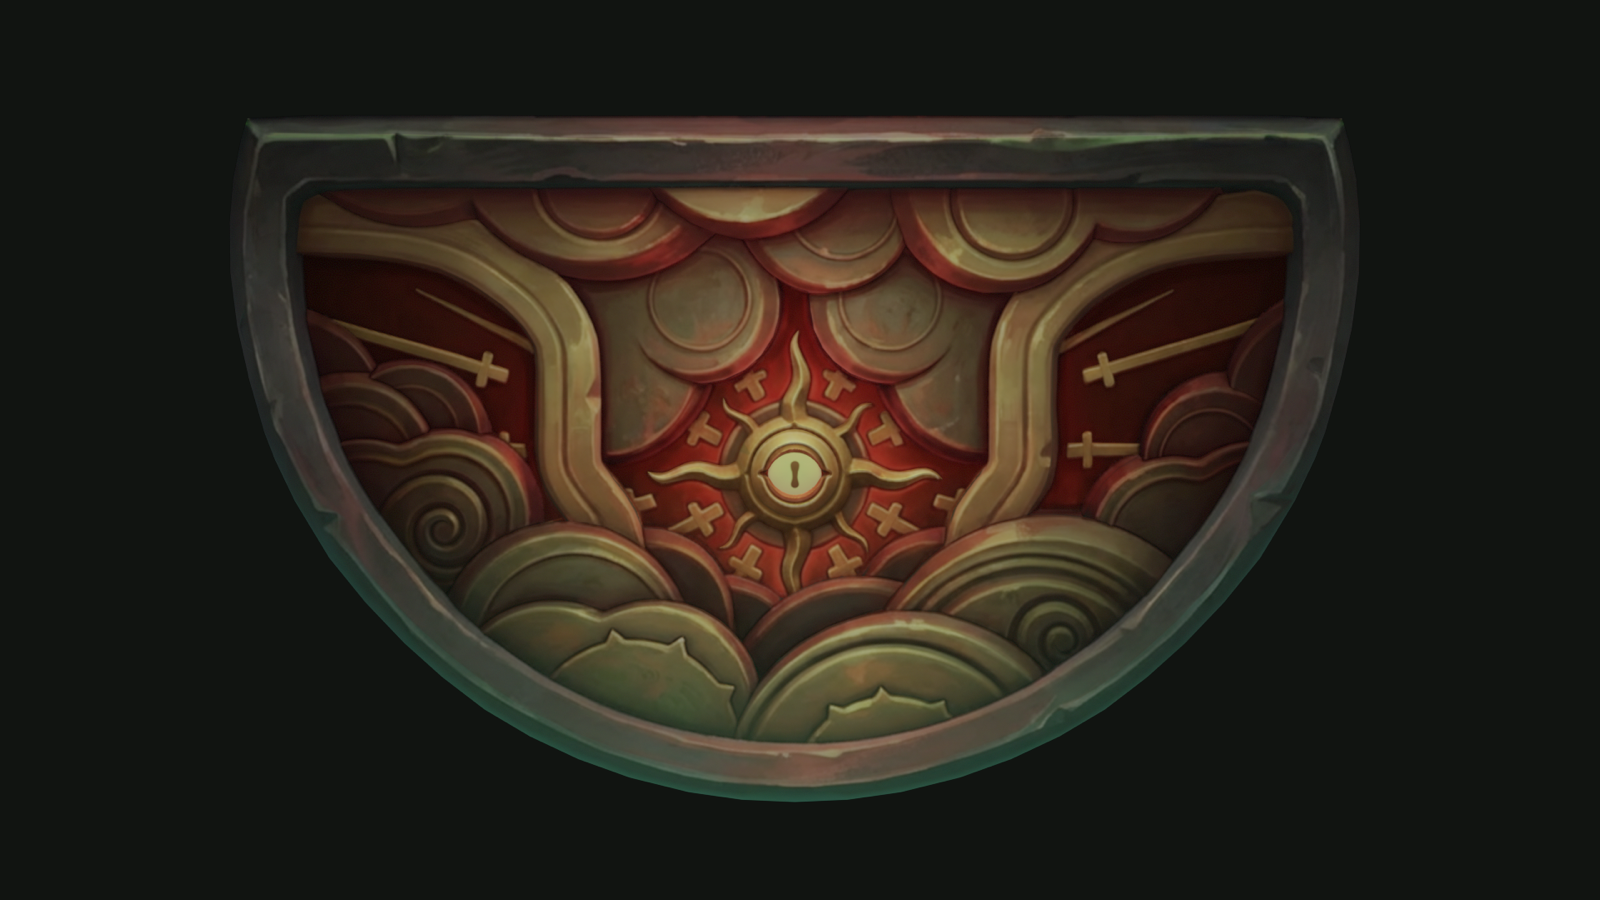
The goal here is not to generate random texture art from scratch. The goal is to take an existing texture, improve it faster, compare stronger variations, and send the result back onto the model with less friction. That is where AiPainter fits: it keeps AI inside Photoshop, which is already where layering, masking, cleanup, and visual judgment happen for many 3D artists.
Why this workflow works
This example uses 3DCoat rather than Substance Painter because 3DCoat and Photoshop have a convenient bridge for quickly sending texture projections into an external editor and reloading them back into the 3D scene. That fast round-trip is what makes this workflow production-friendly.
Instead of exporting files manually, uploading them to separate AI tools, downloading results, and rebuilding context every time, you can keep Photoshop in the middle of the loop and judge the output back on the model where it actually matters.
What you need
- 3DCoat
- Adobe Photoshop
- AiPainter installed in Photoshop
- A model with base textures already prepared
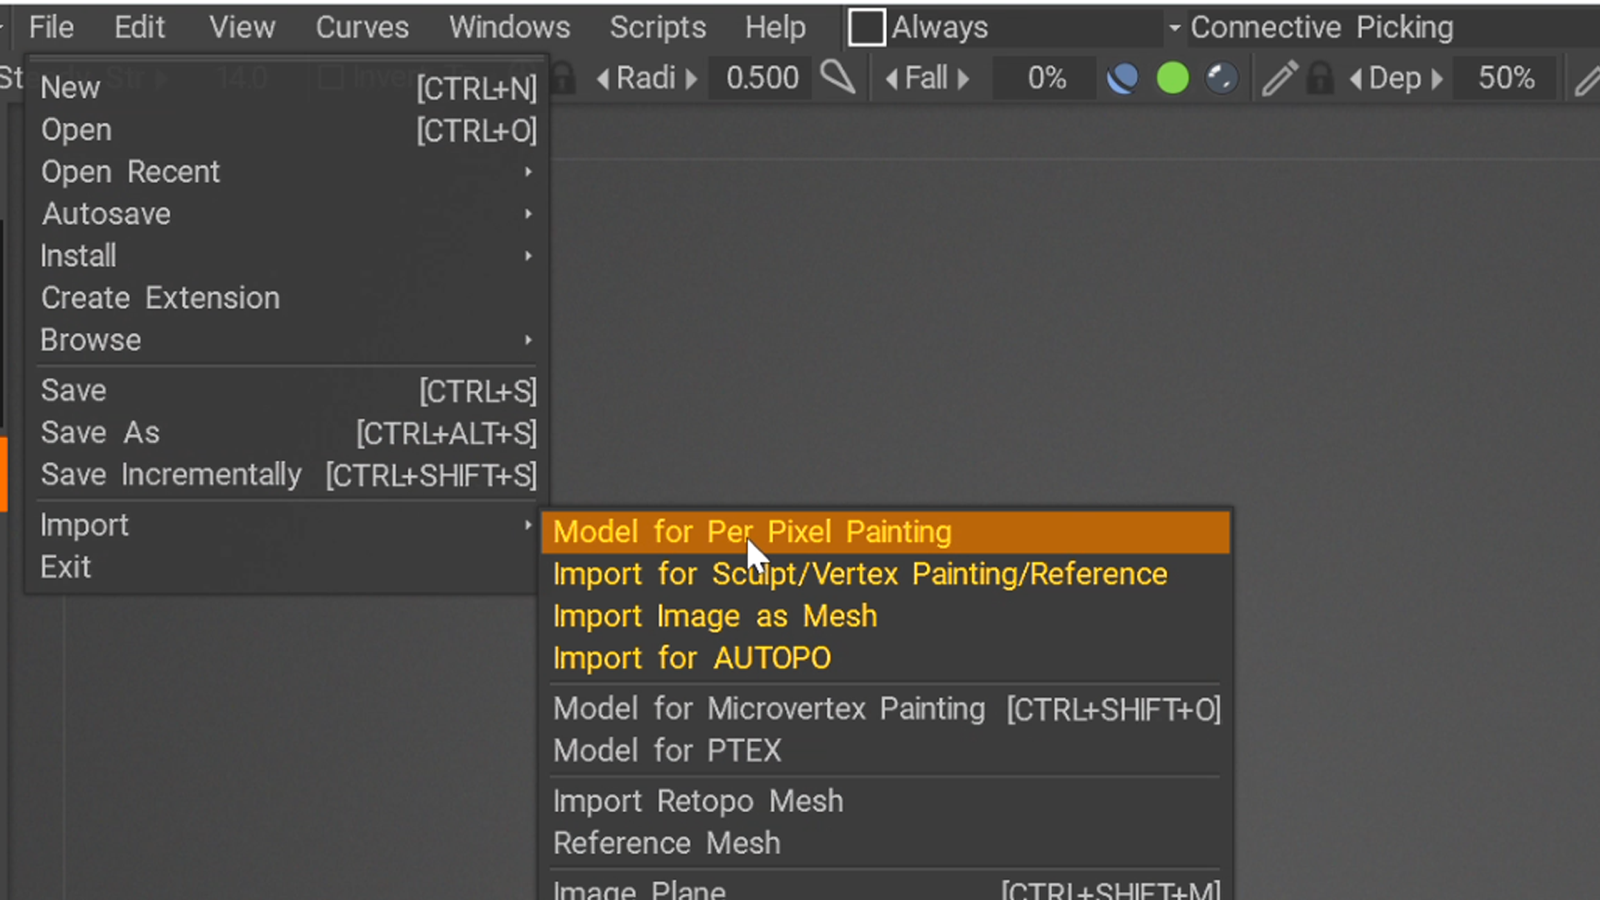
Step 1. Import the model and base texture in 3DCoat
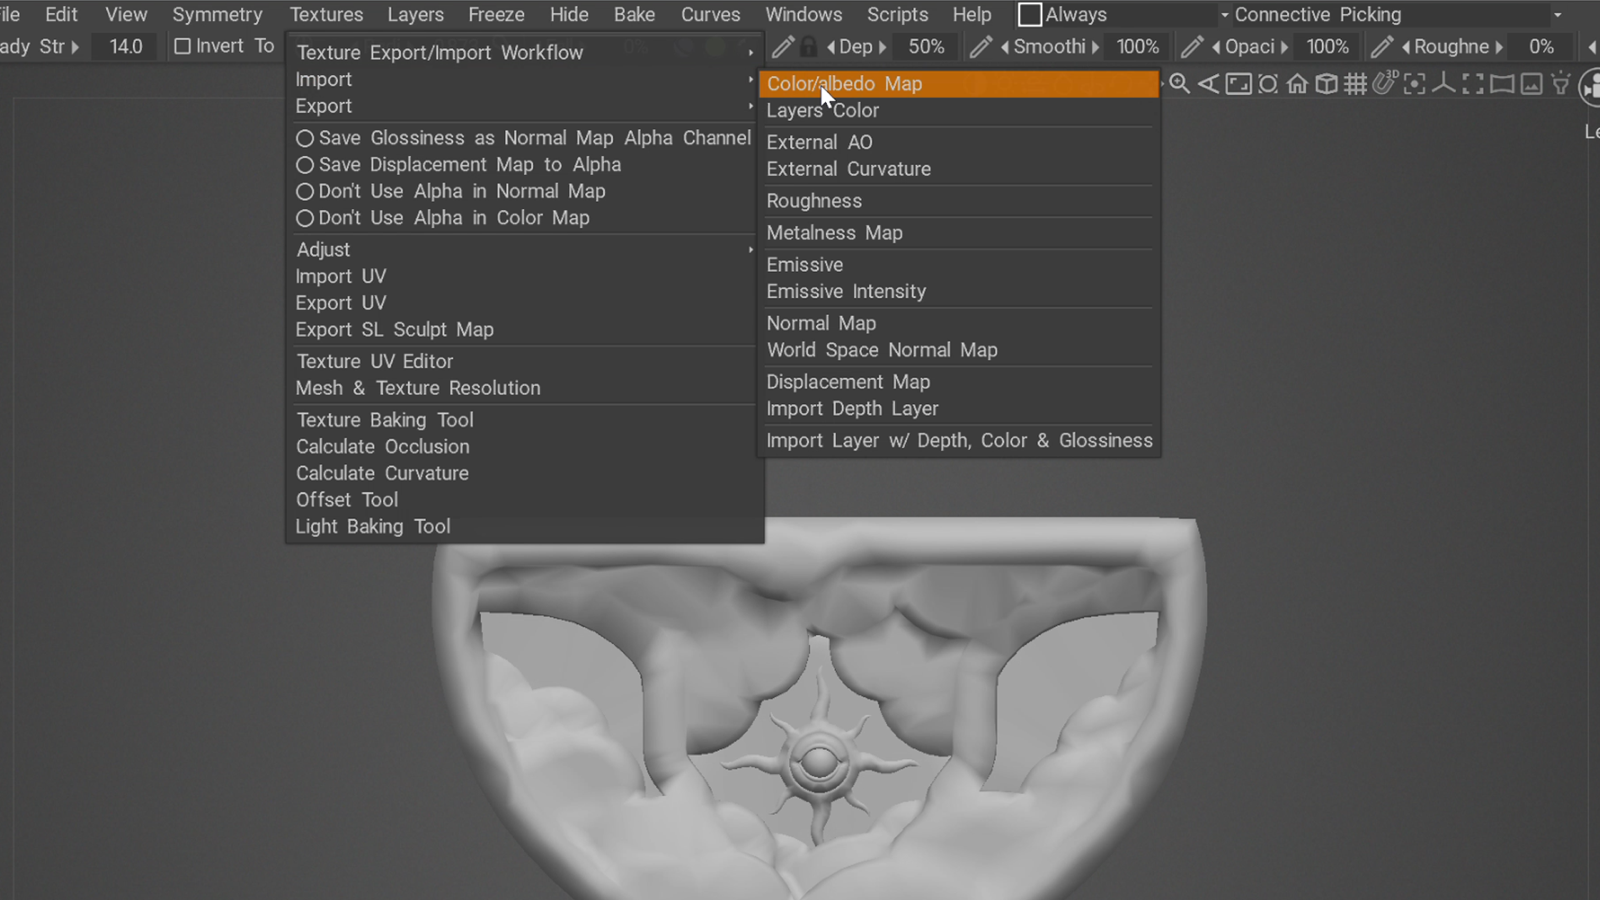
Start in 3DCoat with File → Import → Model for Per Pixel Painting. Then apply the base texture through Textures → Import → Color. After that, press 2 on the keyboard to switch to the Color map view only.
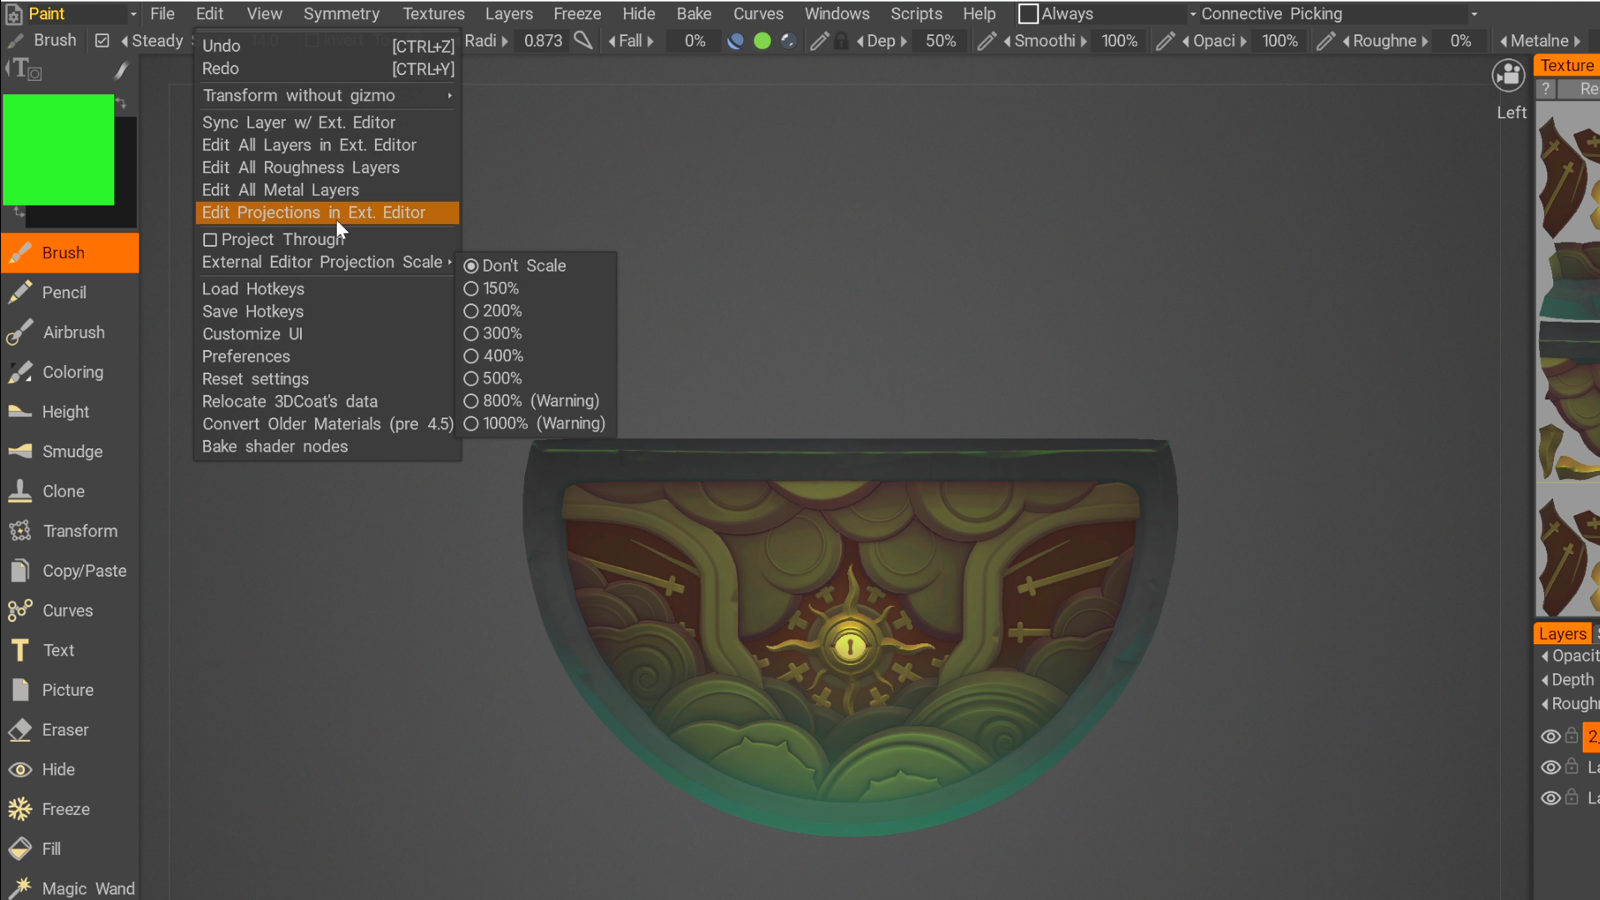
Step 2. Send the projection directly to Photoshop
Next, send the current projection into Photoshop with Edit → Edit Projection in Ext. Editor. If this is your first time using the bridge, 3DCoat may ask you to set the path to Photoshop. Once that is configured, it opens a PSD projection file automatically.
Step 3. Clean the PSD and move the texture to a square canvas
Inside the PSD, disable the layers you do not need and keep only the texture layer that you want to improve. Then create a separate 1024×1024 canvas and copy the texture layer into it.
Why use a square canvas? In this workflow, AI image models tend to produce more stable and visually stronger results on square compositions. That gives you a better generation workspace before you return the selected result to the original projection context.
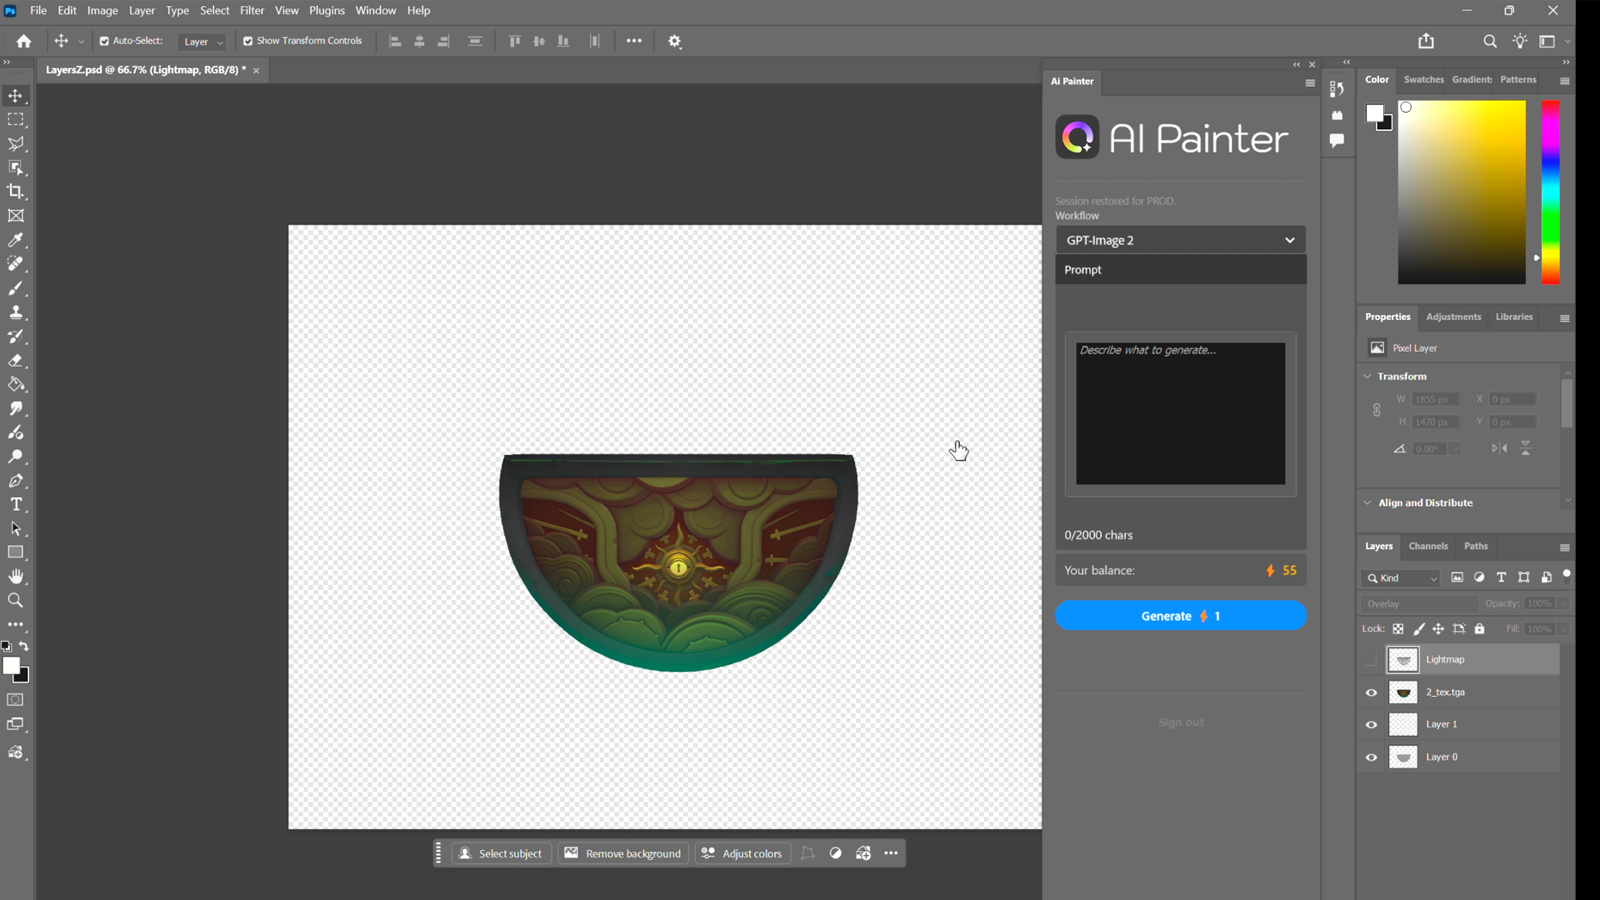
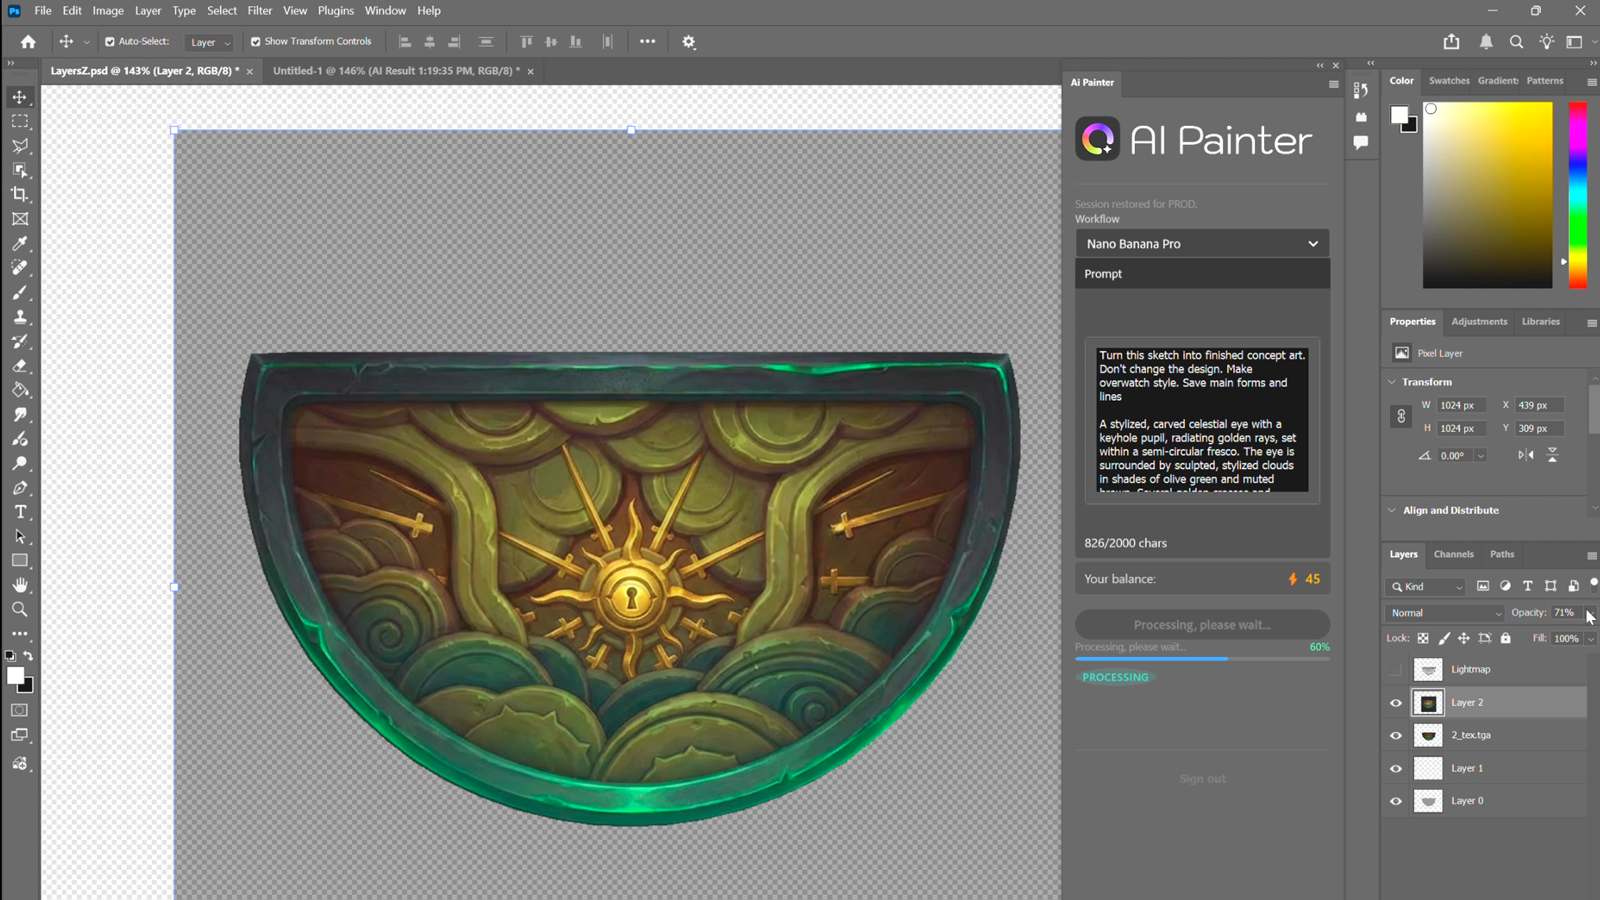
Step 4. Generate improved texture directions in AiPainter
Select the whole square canvas with Ctrl+A, open AiPainter, choose the model you want to use, and write a prompt describing what should be improved. In the example workflow, the model is Nano Banana Pro.
A practical prompt pattern is:
Turn this concept art into finished concept art. Don’t change the design. Make League of Legends style.
This prompt works because it asks for refinement without throwing away the original design. That is the right mindset for production texturing.
- Preserve the main forms
- Preserve the design language
- Improve material richness
- Improve finish quality
- Push the texture toward a clear target style
Step 5. Improve the prompt with image-to-prompt when needed
If the first generations are too vague, you can make the prompt more descriptive by using an image-to-prompt tool. In the example workflow, the texture image is uploaded to an image-to-prompt service, the General Image Prompt option is selected, and the generated description is used to expand the original prompt.
This helps the model understand decorative motifs, material relationships, lighting mood, and stylistic cues much more precisely than a short generic prompt alone.
Step 6. Generate multiple variants and place the best result back over the original texture
Do not stop after one generation. Create several versions. Different outputs usually solve different problems better: one may preserve stylization more accurately, one may improve edge lighting, and one may create stronger material separation.
After comparing the variants, copy the strongest result and return to the projection canvas from 3DCoat. Then place the generated image over the original texture and align it as accurately as possible.
This alignment step is critical. A good generation still becomes weak production content if it is positioned poorly against the original texture structure.
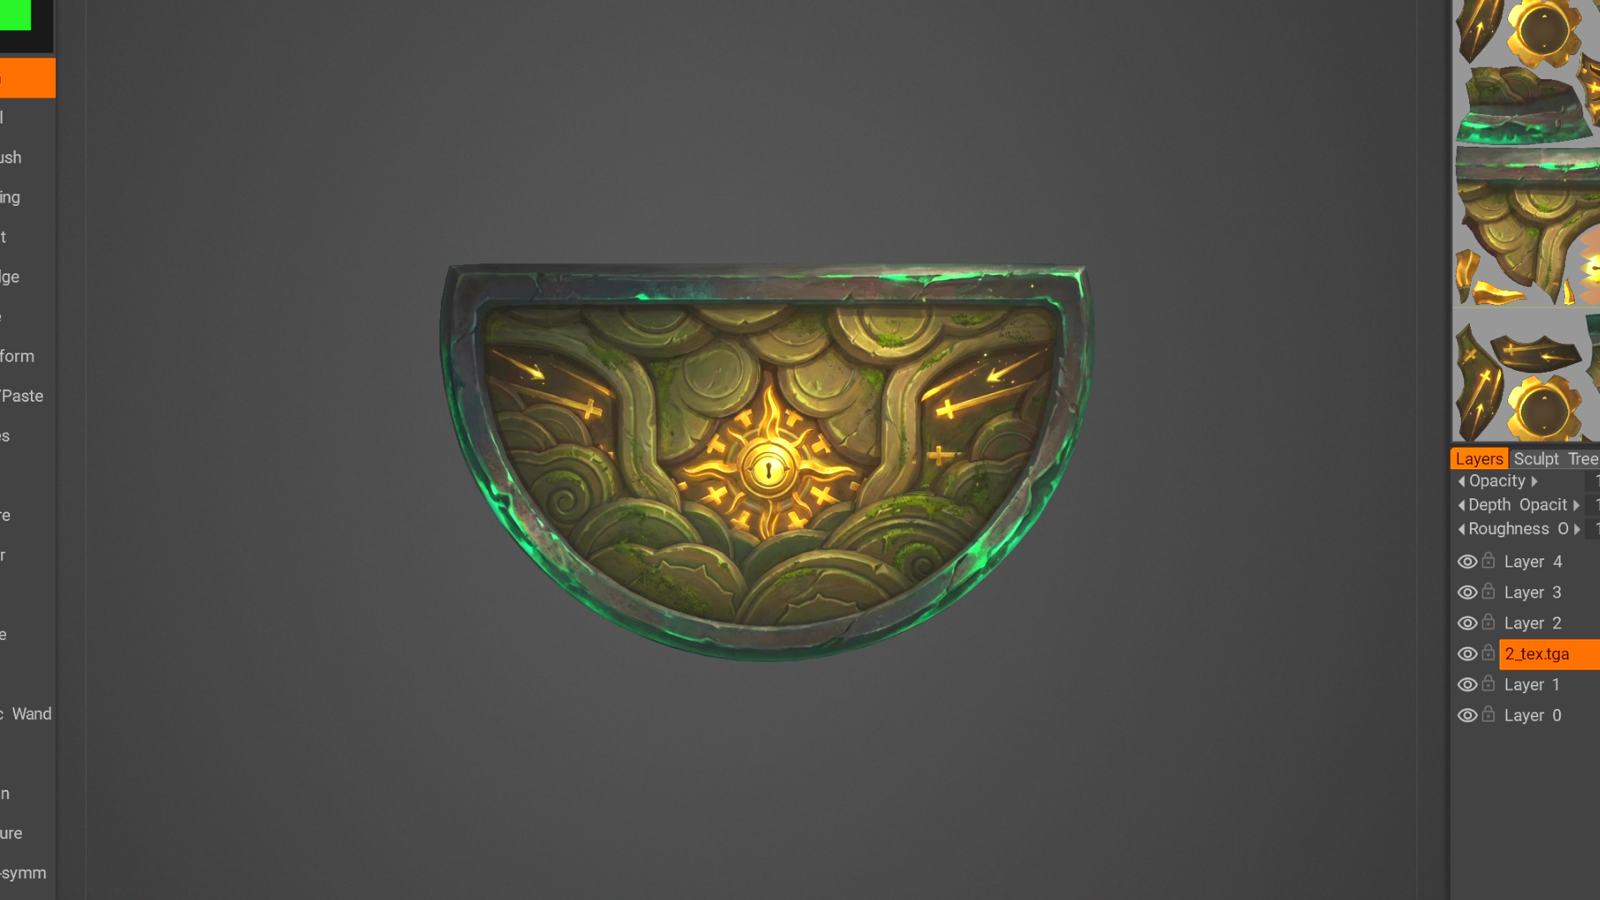
Step 7. Save and reload the result in 3DCoat
Once the generated layers are positioned correctly, press Ctrl+S in Photoshop and return to 3DCoat. It will automatically begin loading the updated layers. From there, you can control opacity, inspect how the result behaves on the model, and decide whether the texture is ready to export.
Why this is more valuable than a generic prompt workflow
The real value is not “AI inside Photoshop” as a gimmick. The value is that Photoshop stays the central editing space inside a real 3D production loop.
- Send the texture projection straight into Photoshop
- Generate controlled refinements in AiPainter
- Compare multiple variants in layers
- Save the result back into 3DCoat
- Evaluate the texture on the model immediately
That shortens the distance between exploration and usable asset work.
FAQ
Why use a square canvas instead of the original projection size?
In this workflow, square canvases tend to produce more stable image-generation results. The square version acts as a generation workspace before the selected result is placed back into the original texture context.
Why not generate the final texture directly in a browser tool?
Because the point is not only to generate an image. The point is to keep the texture connected to the Photoshop layer workflow and to the 3DCoat round-trip.
Is this workflow only for 3DCoat users?
No. The logic can apply more broadly, but this guide is specifically built around 3DCoat because the bridge to Photoshop makes the round-trip faster and clearer.
Final takeaway
The best use of AI in texturing is not replacing the artist. It is reducing friction inside a workflow the artist already trusts. If you already move between 3DCoat and Photoshop, AiPainter gives you a practical way to test richer texture directions, preserve the original design, and send stronger results back into your 3D asset faster.